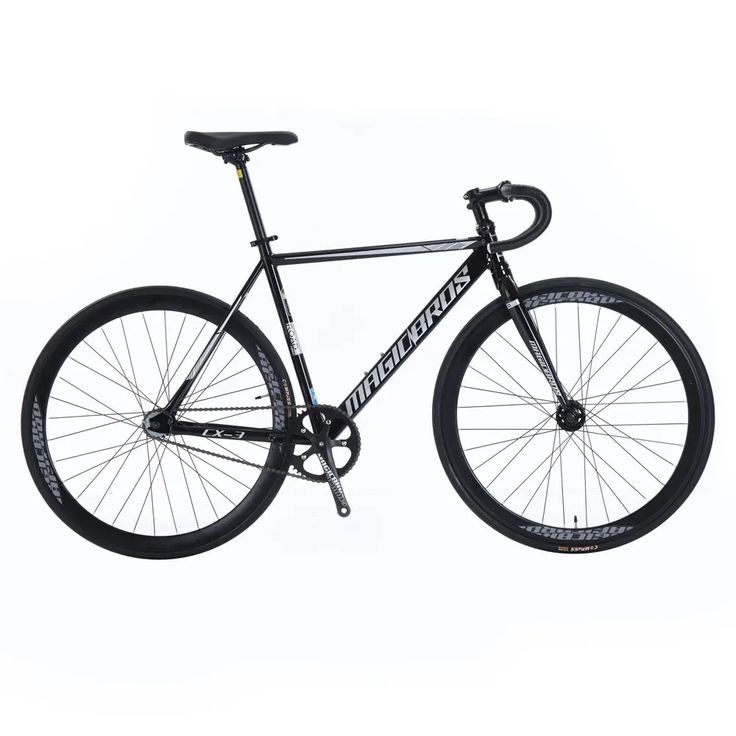
Identifying the Correct Frame Size
Choosing the right frame size is vital for a comfortable ride. It ensures that you can handle the bike with ease and prevent strain. Here are simple steps to find the correct bicycle frame size:
- Measure Your Height: Stand straight against a wall and measure your height.
- Refer to Size Charts: Bike shops and manufacturers provide size charts. Match your height to the recommended frame size.
- Check the Standover Height: Stand over the bike’s top tube. You should have a few centimeters of clearance.
- Consider Reach and Stack: These measurements indicate the bike’s length and height. They are crucial for proper fit.
- Test Ride Different Sizes: If possible, try riding various bike sizes. The right one should feel natural and comfortable.
- Seek Professional Advice: If in doubt, ask for assistance at your bike shop. They can help fine-tune your choice.
The correct frame size forms the groundwork for a correct bicycle riding position. It’s the first step to achieving the perfect bike fit and enjoying your rides.

Choosing the Appropriate Saddle
Choosing the right saddle is crucial for long-term comfort and preventing injuries. When selecting a saddle, there are two main aspects to consider: saddle width and style.
Considering Saddle Width and Style
Saddle Width: This should roughly match the width of your sit bones. The correct width helps distribute your weight evenly. This can prevent soreness and discomfort during long rides. Most bike shops can measure your sit bones to recommend the right saddle width.
Saddle Style: The style of the saddle depends on your riding type. Road bike saddles are generally long and narrow, which helps in a forward-leaning position. For casual riding, a wider and more cushioned saddle is preferable, offering more comfort at an upright angle. Some saddles are gender-specific, catering to the anatomical differences between men and women, although many find that unisex models work well.
Choosing a saddle involves considering your bike type, riding style, and personal comfort preferences. Opting for a saddle that fits well can transform your riding experience, making it more enjoyable and less physically taxing.
Optimal Saddle Height Adjustment
Finding the right saddle height is key to a comfortable ride and efficient pedaling. Here’s how to adjust your saddle to the optimal height:
- Heel on Pedal Method: Sit on your bike and place your heel on the pedal. When the pedal is at its lowest point, your leg should be fully extended without rocking your hips.
- Knee Slight Bend: With your foot in the normal pedaling position, there should be a slight bend in your knee at the pedal’s lowest position. This prevents strain on your knee joints.
- Check Hip Stability: While pedaling, ensure your hips are stable. Rocking hips can indicate that the saddle is too high.
- Adjust Gradually: If you make changes, do so in small increments. Fine-tuning is better than making large adjustments all at once.
- Test Ride: After adjustments, take a short ride to check comfort. Your legs should move freely without reaching or straining.
- Re-evaluate: If you feel discomfort after your test ride, re-evaluate and adjust again if needed. Comfort is key to a correct bicycle riding position.
These steps will help you find the optimal saddle height for both comfort and pedaling efficiency. Remember, small adjustments can make a big difference.

Saddle Angle and Horizontal Positioning
Setting the correct saddle angle is crucial for a comfortable and efficient ride. The saddle should be parallel to the ground as a starting point. This position helps distribute the rider’s weight evenly and prevents sliding forward or backward. Men might prefer a slight upward tilt of the saddle nose, while women may find a slight downward tilt more comfortable.
Adjusting the horizontal position of the saddle, also known as the saddle’s fore-aft position, is equally important. You should set this so that when the bike’s cranks are horizontal, your knee cap is right over the pedal spindle. This is known as the Knee Over Pedal Spindle (KOPS) position.
It’s essential to check the saddle height again after adjusting the fore-aft position, as changes can affect your reach to the pedals. Iterative adjustments might be necessary to find the perfect balance. Remember, never attempt to adjust the handlebar reach by altering the saddle position. These adjustments should be distinct to ensure optimal set up.
Saddle angle and horizontal positioning significantly influence comfort and performance. Taking time to fine-tune these settings at the start can enhance your overall riding experience. Always ensure that the adjustments cater to your specific body measurements and riding style.
Handlebar Height and Reach Configuration
Setting the handlebar height and reach correctly is essential for a comfortable cycling posture. To achieve this, follow these steps:
- Assess Your Comfort: Start with the existing handlebar setting and note any discomfort.
- Adjust Height: Change the height of the handlebar by adding or removing spacers.
- Check Elbow Bend: While holding the handlebars, your elbows should be slightly bent.
- Determine Reach: Ensure you can grip the handlebars without overstretching your arms.
- Use Stem Adjustments: If needed, alter stem length to modify the reach further.
- Observe Back Position: Your back should not be overly arched or strained.
- Finalize Your Fit: Make fine adjustments and test ride to confirm comfort.
By tailoring these aspects of your handlebar setup, you create a balanced riding position that can prevent fatigue and injury. Comfort and control are key to a correct bicycle riding position.

Relationship Between Saddle and Handlebar Alignment
Achieving the correct bicycle riding position involves more than adjusting the saddle and handlebars separately. The relationship between the saddle and handlebars plays a critical role in determining overall comfort and efficiency while riding.
Importance of Proper Alignment
Proper alignment between the saddle and handlebars ensures that your body is positioned to maximize power and minimize strain. It helps balance your weight evenly across the bike, which enhances control and reduces fatigue. Incorrect alignment can lead to discomfort in the arms, shoulders, and back, and can compromise your ability to ride efficiently.
Steps to Align Saddle and Handlebars
- Saddle Height First: Adjust your saddle height before setting the handlebar height. This sets the foundation for your riding posture.
- Handlebar Reach: Make sure the reach to your handlebars allows a slight bend in your elbows. This helps absorb shocks and maintain control.
- Check Back Alignment: Your back should feel natural and relaxed, not arched or stretched, which indicates good alignment.
- Final Adjustments: Once you adjust the saddle and handlebars, take a test ride. Notice any discomfort or strain and adjust accordingly.
Key Considerations
- Always adjust the handlebar reach and height after setting the saddle height.
- Your forearms should be roughly parallel to the ground when your hands are on the handlebars.
- Ensure you can easily access the brake levers and shifters without stretching.
By fine-tuning the relationship between your saddle and handlebars, you can achieve a correct bicycle riding position that boosts comfort and enhances your riding performance. Regular checks and adjustments can maintain optimal alignment as your riding style and conditions change.
Crank Length and Cleat Position
Choosing the right crank length and cleat position is essential for a correct bicycle riding position.
Crank Length
Crank Length Importance: Crank length affects your pedaling mechanics and comfort.
Measurement: Cranks range from 165mm to 175mm for most riders. Your leg length and riding style determine the best length.
Adjustment: Consult with a bike fitter or use a formula to estimate ideal crank length.
Comfort and Power: Proper length allows for efficient power transfer and reduces strain on joints.
Cleat Position
Cleat Placement: Cleats attach your shoes to the pedals. Their position is vital for knee alignment and pedaling efficiency.
Adjustment Tips: Start with cleats under the ball of your foot. Make small adjustments as needed.
Foot Angle: Ensure your foot angle feels natural with no strain on the knees.
Float Adjustment: Float lets your foot pivot slightly while clipped in. Find a comfortable range to avoid injury.
Crank length and cleat position contribute significantly to your cycling comfort and efficiency. Proper setup minimizes the risk of injury and maximizes your riding pleasure.
The Role of Stack and Reach in Bike Fit
Stack and reach are vital to finding the correct bicycle riding position. These measurements define the bike’s framework in relation to your body size.
Understanding Stack and Reach
Stack is the vertical distance from the bottom bracket to the top of the head tube. It influences the bike’s handlebar height. A higher stack gives a more upright riding position. This can boost comfort for long rides.
Reach is the horizontal length from the head tube to the bottom bracket. It affects how far you lean forward. A shorter reach can reduce strain on your back and wrists.
To find the right stack and reach:
- Understand Your Body: Know your arm and torso lengths.
- Compare Measurements: Check bike specifications for stack and reach values.
- Consult a Size Chart: Use manufacturer charts to see what fits your measurements.
- Experience Different Setups: Test ride bikes with varying stack and reach measurements.
- Get Personal Advice: Consider a professional bike fit consult for tailored advice.
Proper stack and reach settings help prevent discomfort and improve control. They ensure the bike fits your body, not the other way around. Adjust these measurements for the best ride quality and efficiency.
Final Adjustments for Enhanced Riding Comfort
Finalizing your bike fit with precise adjustments is the key to enhanced riding comfort. Here’s a checklist to ensure your bicycle riding position is correct after making your initial changes.
- Review Your Posture: Take a moment to review your posture while riding. Your spine should be neutral, not arched or slouched.
- Reassess Saddle Height: Double-check your saddle height. Your knee should have a slight bend when pedals are at their lowest point.
- Refine Saddle Position: Confirm that the fore-aft saddle position still aligns with your knee cap directly over the pedal spindle.
- Check Handlebar Position: Ensure the handlebars are at a height where your elbows naturally bend and your shoulders are relaxed.
- Modify Handlebar Reach: Modify the reach if necessary. You shouldn’t feel overstretched or too cramped.
- Test Ride: Go for a test ride to observe any discomfort. Pay attention to your hands, feet, and seat area while cycling.
- Listen to Your Body: Be attentive to what your body tells you post-ride. Any lingering discomfort may signal the need for further adjustments.
- Record Changes: Keep a log of the changes made. This can help track what works best for your riding comfort.
- Regular Check-ups: Periodically check your setup, especially after long rides or if your riding style changes.
By following these steps, you ensure that your bicycle is custom-fit for maximum comfort and control. Remember, even after achieving the correct bicycle riding position, it is important to listen to your body and make adjustments as needed.